
Anti-RFID DIY Duck Tape Wallet of Awesome
11 Sep 2014The only wallet you will ever need.
I have never been happy with store-bought wallets. Why? Maybe it’s because I’m way to hipster to be using some mainstream store bought billfold. Maybe it’s that I don’t like the idea of paying for something, that is supposed to hold money. What it really boils down to, is that I take pockets very seriously, and I know exactly which ones I want.
##There is a Better Way.
Enter the Duck Tape Wallet. Exactly what you want, nothing that you don’t. Personally this is my list
- Durable
- Fashionable (Obviously)
- Long unshielded pocket (for checks/bus card)
- Billfold style
- Clear ID pocket
- 2-3 Card holders
- RFID Blocking Interior
Your needs/wants may vary. But with a little creativity you should be able to accommodate whatever configuration your little heart desires. Duck Tape comes in all colors and patterns, and if you want more durability, you could even make it all from Gorilla Tape (I may try this).
Update: Warning! Gorilla Tape does not bend nearly as well as Duck tape. I do not recomend making anything more than one outside layer from it. It quickly adds bulk, and makes it difficult to keep folded.
##Blah, Blah, Blah. Show me How Already!
Okay fine! for starters, you will need to go grab your roll of duck tape (what do you mean you don’t have any? Disgrace.)

You are going to begin by deciding the dimensions of your wallet. Mine is roughly 4”x 3”, but pick a size you like. Take the width and double it, and ripple the height. Using strips of tape, make a sheet roughly 8”x9” (or adjusted to whatever dimensions you picked)

As you can see, I also decided to make the back of panel A out of Gorilla Tape (for extra strength) and to sandwich some Aluminum Foil in the B section for RFID blocking for my cards.
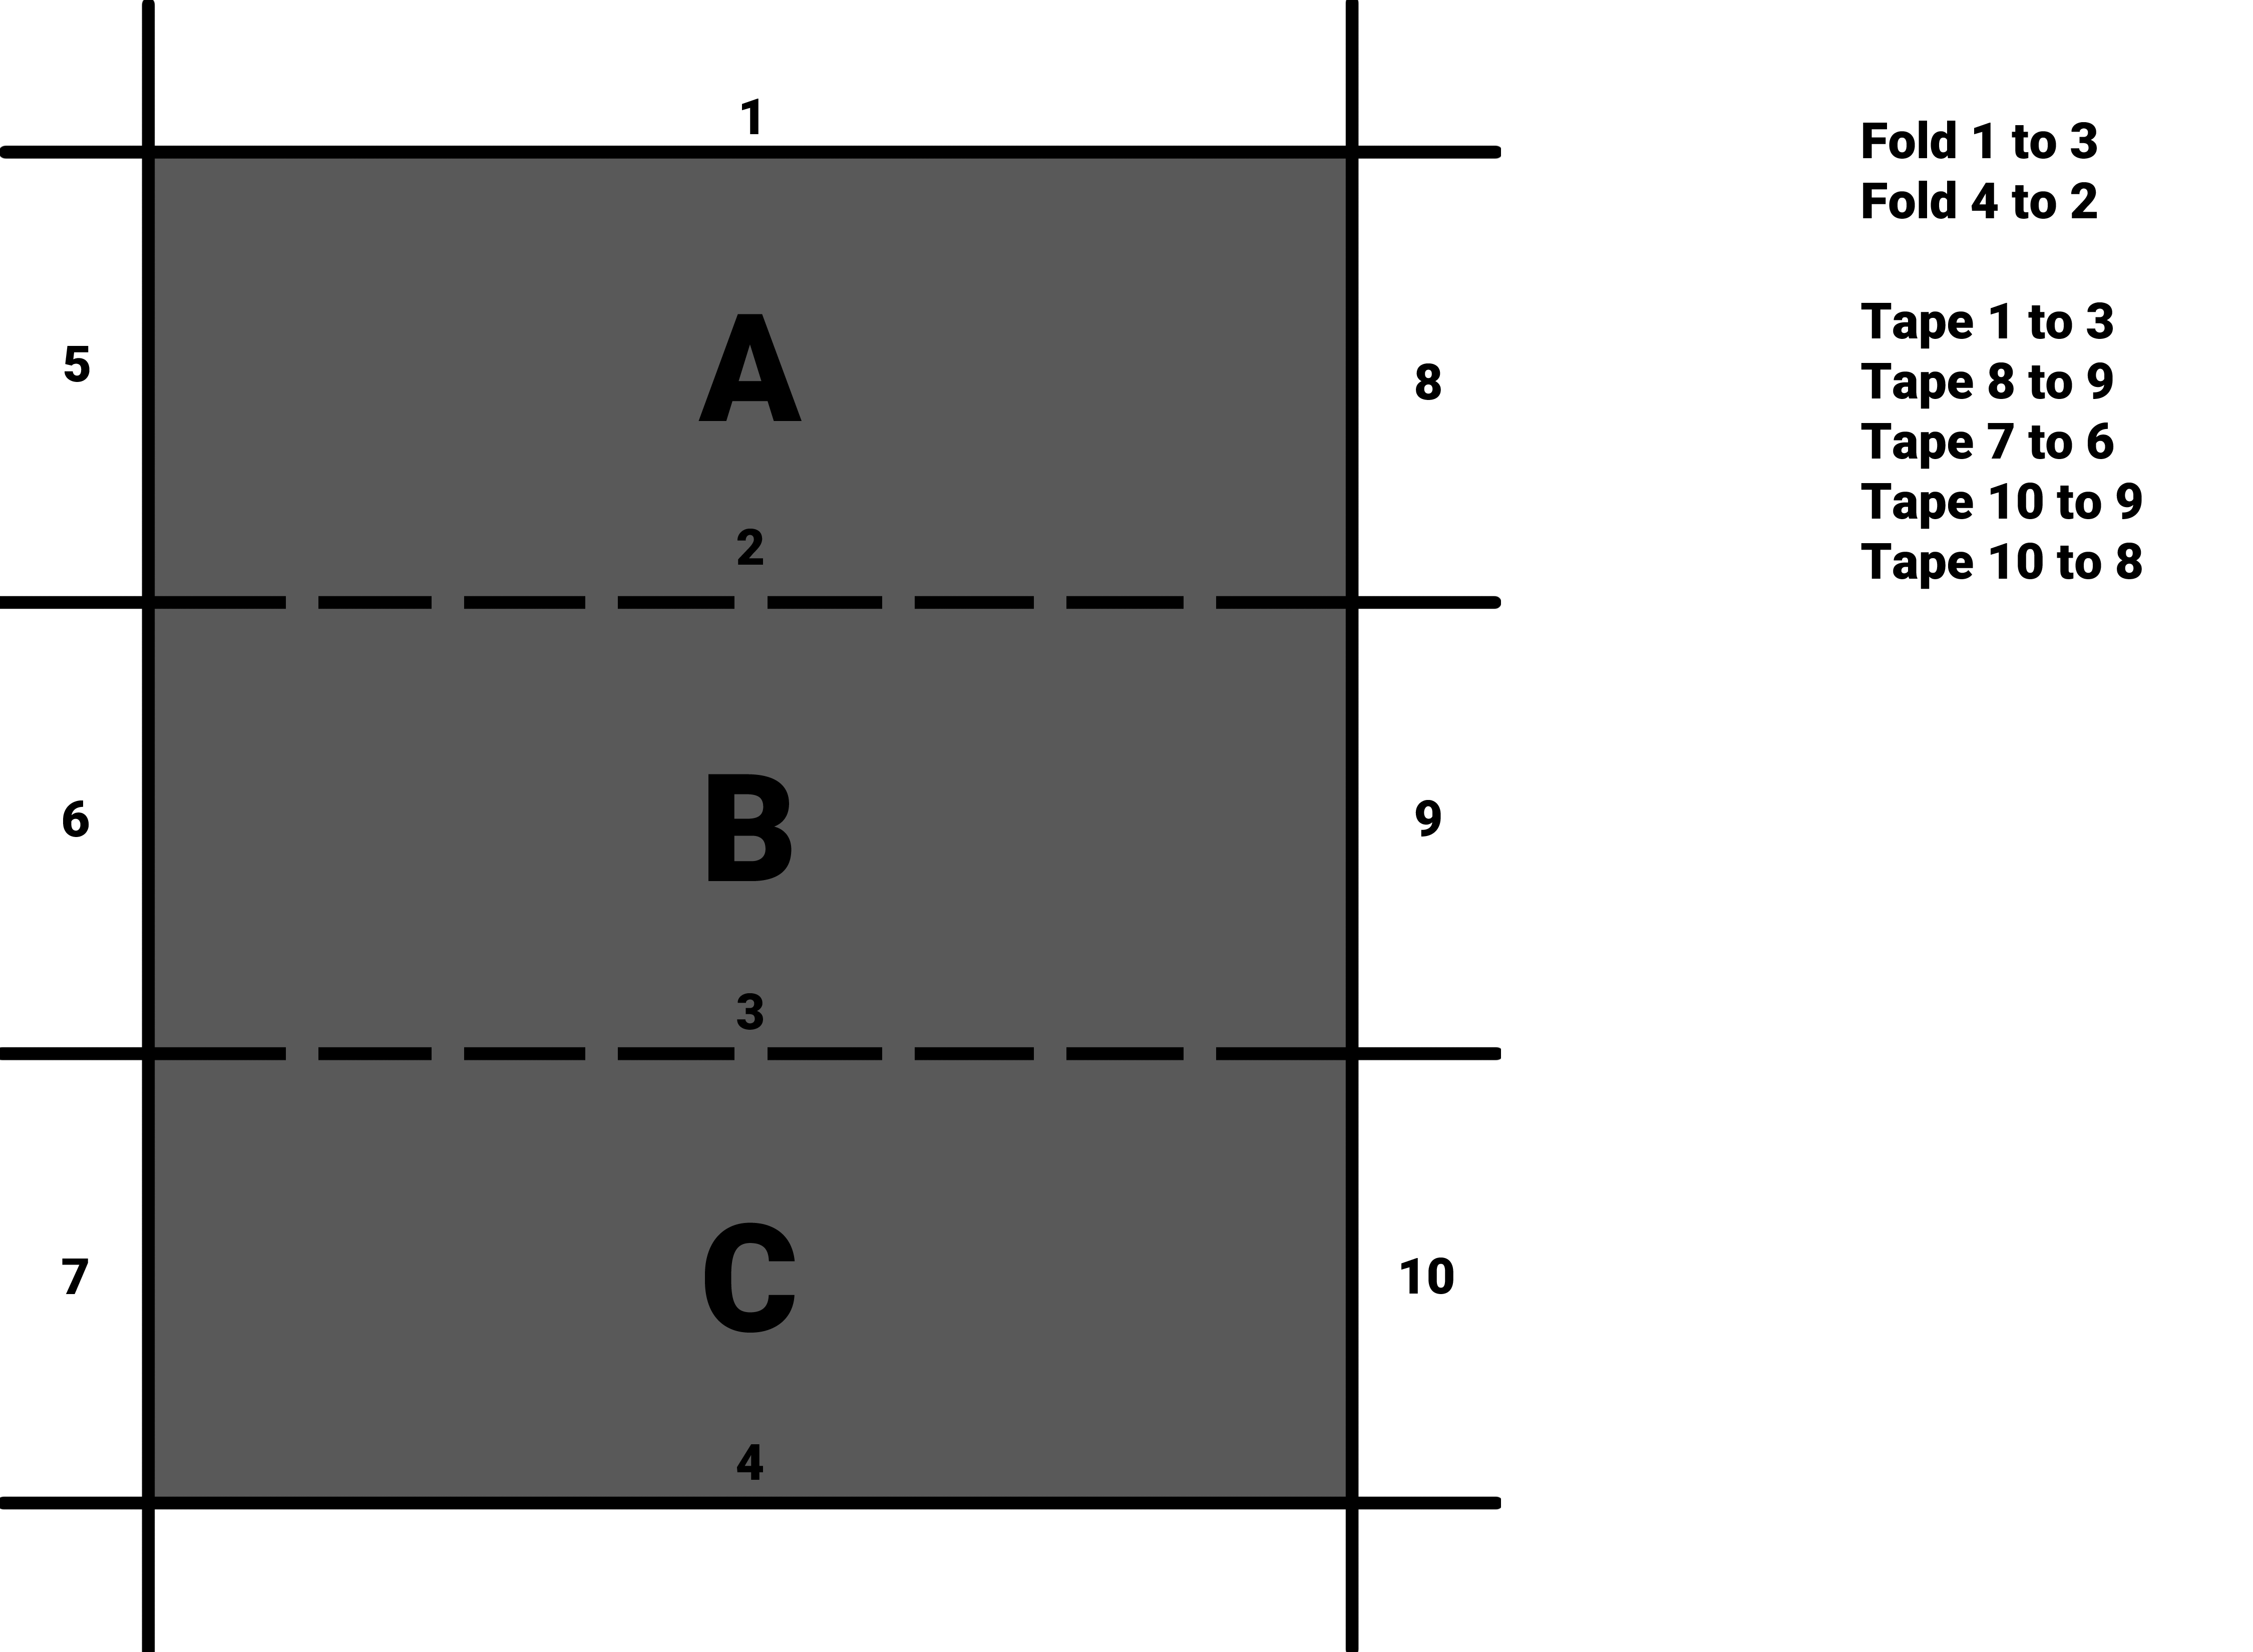
Then simply follow these instructions to get the basic shape. You should end up with a simple billfold style wallet with a check (or other long paper) pocket on the left. Note: If you don’t want that extra side pocket, tape 5 to 6 right after you tape 8 to 9, or simply remove panel A (which may decrease durability).
At this point you should have a 8”x3” strip with the back of “C” facing up.

At this point you can add as many card pockets as you want. I have a piece of clear plastic (packing tape folded over on itself can be used) for my ID, and two card holders (Debit, and Bus Pass in my case). Feel free to experiment here, if you carry a lot of different cards, you may want to put more.
At the end of the day, you should have a stylish, functional, customized wallet. That cost you almost nothing but time (assuming you already had tape).
When I get around to constructing my new one I will post pictures of the actual process.